Whether you need to install or upgrade Windows on your computer, a bootable USB stick is always useful. You may also generate a Windows 10 bootable USB from a public computer (or a friend’s) if you don’t have a decent Internet connection.
You may upgrade/install Windows 10 without an Internet connection using a Windows 10 bootable USB stick. You will, however, require an active Internet connection to activate it.
So, in this post, we’ll go through the simplest ways to make a Windows 10 bootable USB.
Create Windows 10 Bootable USB
Note: If none of the techniques listed below work for you, you can use the command prompt to construct a bootable USB flash drive, as described in Microsoft Docs.
Using Rufus, create a bootable Windows 10 USB from the ISO.
Rufus is one of the most widely used applications for creating a bootable Windows 10 USB drive. However, you must first download the Windows 10 ISO file from the official website before using Rufus.
Note: You will only be able to download the media production tool if you view the download page from a different OS (Ubuntu, Mac), your smartphone, or using proxy services like Hide.me.
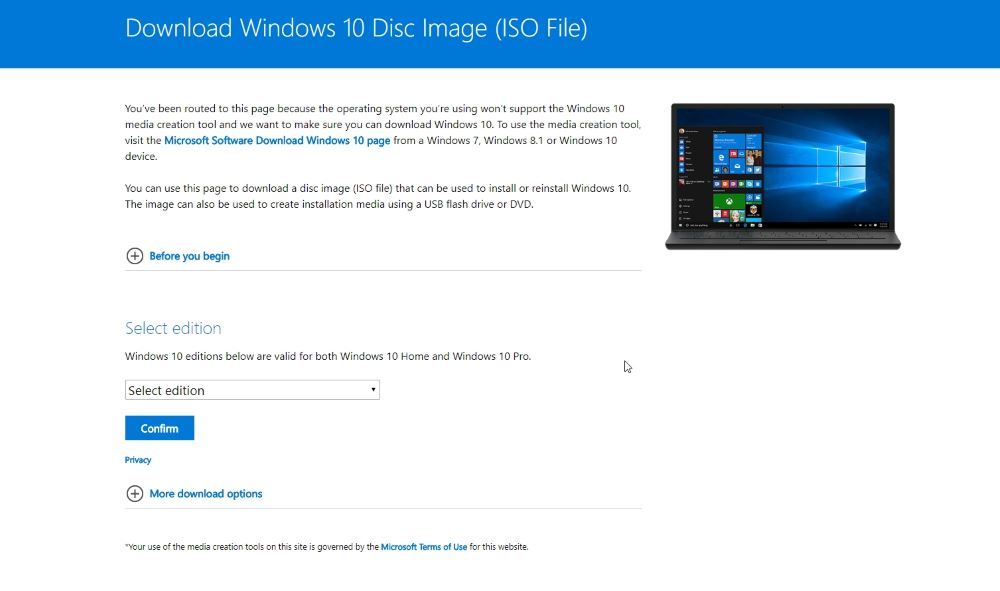
After you’ve downloaded it, click “Confirm” and pick the edition (now – Windows 10 April 2018 Update). When you’re finished, you’ll be prompted to choose a product language (English / English International in this case). As a result, go ahead and acquire the Windows 10 32-bit/64-bit download links.
Note: The generated links will be valid for 24 hours after they are created. As a result, you must obtain the ISO file before the link expires. Given that you now have the picture file, you should download Rufus from its official website.
To create a bootable Windows 10 USB flash drive with Rufus, follow the instructions below:
- Step 1- Run the EXE file after downloading the setup file from Rufus’ official website to start the utility.
- Step 2- The utility will instantly recognise the USB flash drive as soon as you run it. Choose one of your USB flash drives if you have more than one.
- Step 3- Now you must choose the picture file by selecting it from the drop-down menu.
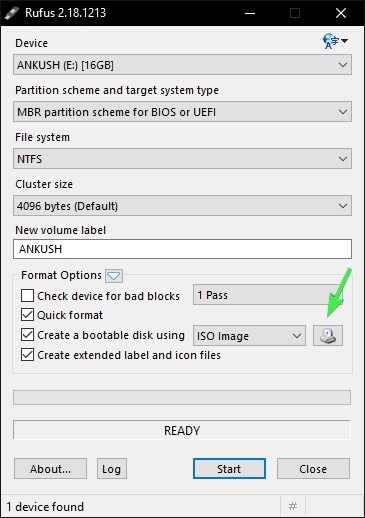
- Step 4- After you’ve selected the ISO file, all you have to do now is click “Start” and wait. It should just take a few minutes to finish. And there you have it! It’s finished!
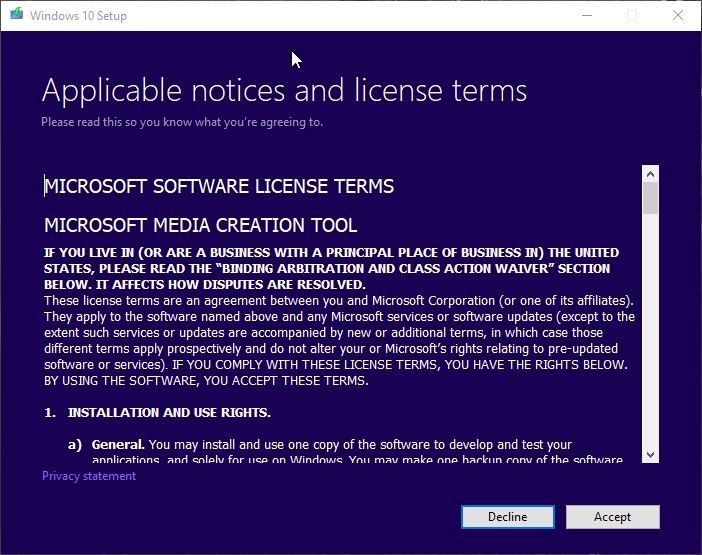
Using the Media Creation Tool, create a Windows 10 bootable USB.
If you don’t want to use any third-party software to create a bootable USB flash drive, go to Microsoft’s Windows 10 download page and download the media creation tool.
After you’ve downloaded it, you can start using it by following the instructions below:
- Step 1- You must accept the agreement before you may use the service.
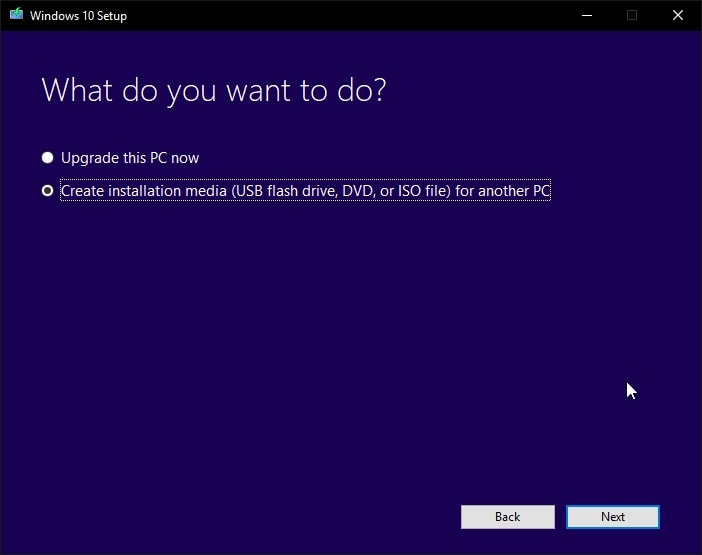
- After that, click “Next” and pick “Create installation media (USB Flash drive, DVD, or ISO file) for another PC.”
- Step 2- You will now be prompted to select the Windows language, edition, and architecture. As a result, choose the one that best suits your needs.

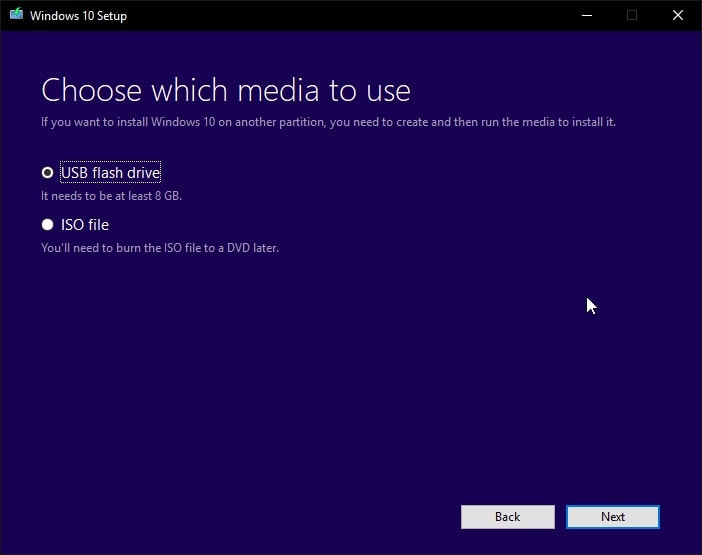
- Step 3- Click “Next” to continue. You will now be asked to choose your chosen medium. Choose “USB flash drive” and make sure the USB flash drive has at least an 8 GB storage capacity.
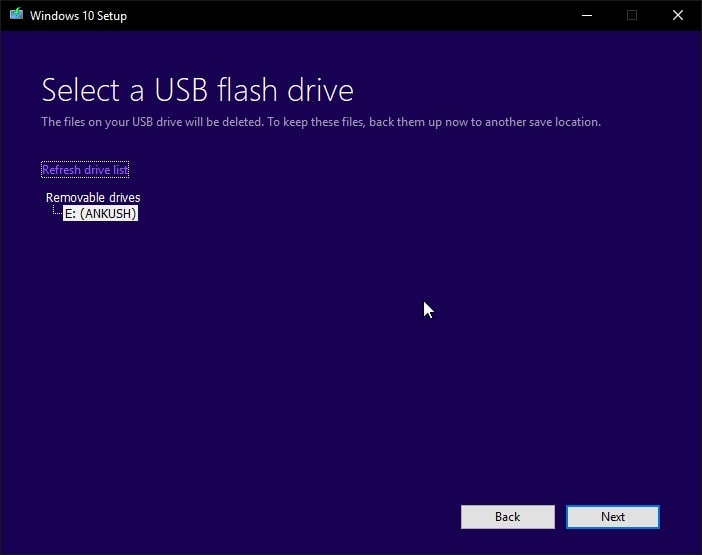
- Step 4- Choose a USB device from the drop-down menu.
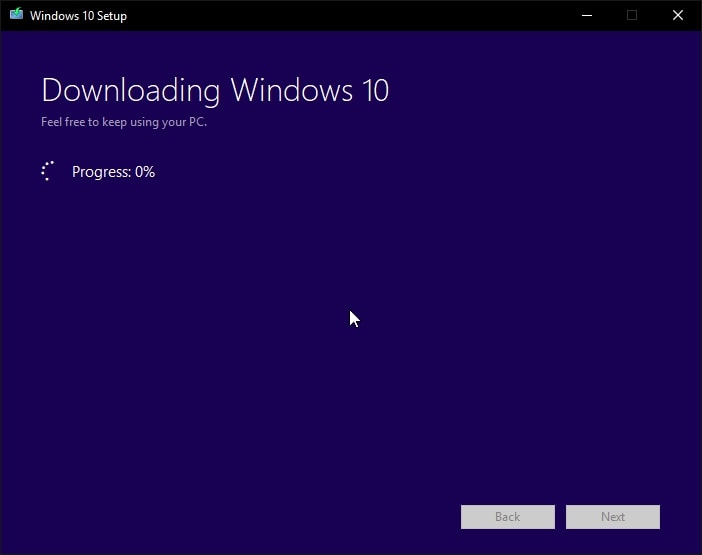
- Step 5- Finally, the necessary data will be downloaded automatically, and the USB flash drive will be turned into bootable USB media. Before creating a bootable Windows 10 USB, all of the contents on the flash drive will be wiped.
You may then install/upgrade Windows using this bootable USB.
Final Thoughts
You may start installing/upgrading your Windows-powered system now that you know how to make a Windows 10 bootable USB. If you have any issues while completing the procedures above, please let us know in the comments section below.