CompatTelRunner.exe is the most talked-about extension among Windows users all around the world right now. Because many Windows customers have reported seeing an unusual extension called Compattelrunner.exe running in their task management, this is the case. Furthermore, it’s worth noting that this extension consumes even more disc space and CPU than Google Chrome, which is notorious for consuming the most CPU and memory. Now, we should clarify that this is not a virus or Trojan, as many Windows users mistakenly assume. Rather, it is a Windows extension that Microsoft has included with the operating system.
What is CompatTelRunner.exe and what does it do?
CompatTelRunner.exe is a Windows extension that was first released by Microsoft in Windows. This plugin assists customers in upgrading to the most recent version of Windows as well as Service Pack Upgrades. It also checks for compatibility issues in Windows and, if any are found, prepares a report and sends it to Microsoft.
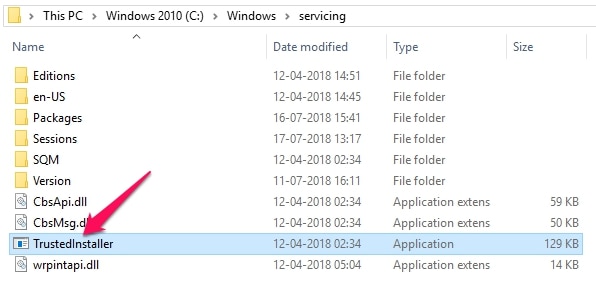
Many Windows users who choose privacy over the latest capabilities have deactivated the CompatTelRunner.exe extension, according to reports. We should warn you, however, that deactivating this extension is not as simple as disabling other extensions. This is because Microsoft has packaged this extension with TrustedInstaller’s signature. As a result, even if you are an administrator, you will receive an Access Denied error message if you attempt to edit this extension.
However, high disc consumption by CompattelRunner.exe is a recognised problem, and we have various options to disable or delete it. We’ve compiled a list of all the possible solutions for the CompatTelRunner.exe disc consumption issue in Windows 10 and Windows 7.
Method 1- In Task Scheduler, disable CompatTelRunner.exe.
The simplest approach to stop compattelrunner.exe from consuming too much disc space is to remove it from the Task Scheduler. Because of this –
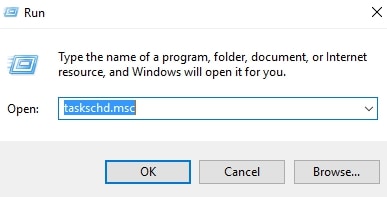
- Step 1- By hitting Windows Key + R, you may access the Run Manager on Windows. Type taskschd. msc into the Run menu and press Enter.
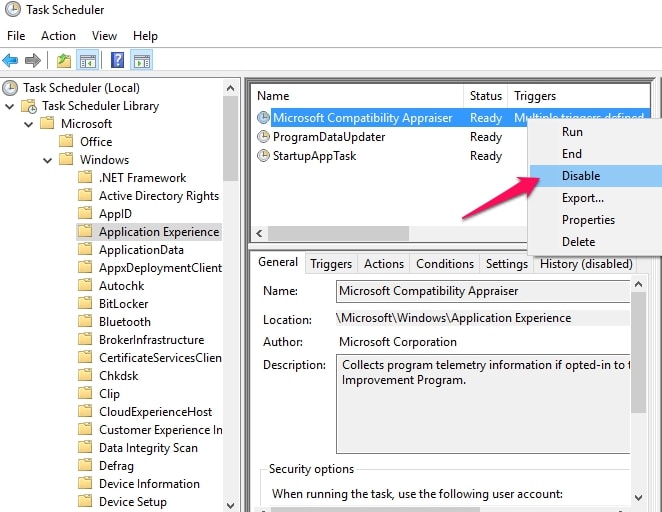
- Step 2- You’ll see that the Task Scheduler has now been launched. On the left side of the Task Scheduler, there is a Task Scheduler Library that you must expand. After you’ve expanded, go to Microsoft, then Windows, and finally Application Experience.
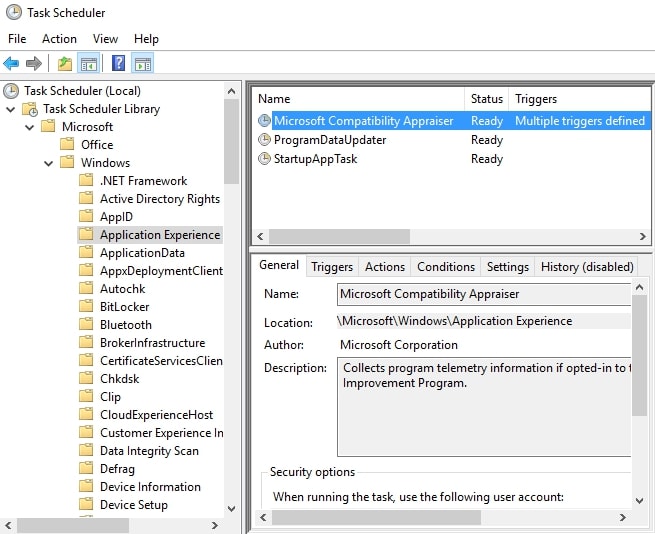
- Step 3- Next to this window, you’ll notice a list of Applications. One programme titled Microsoft Compatibility Appraiser may be found here. Right-click on it and select Disable from the drop-down menu.
You will no longer have a high disc utilisation problem on your Windows PC once you disable the Microsoft Compatibility Appraiser or Compattelrunner.exe software. This is, however, a temporary solution that may or may not work for you. As a result, we’ve included a solution below that allows you to delete it instead of deactivating it. If the aforementioned method fails to work, you can try the one listed below.
Method 2- Delete CompatTelRunner.exe after transferring ownership.
This is the second, and arguably the best, way to fix the compattelrunner.exe excessive disc use issue on your computer. This solution requires us to completely remove the CompatTelRunner.exe programme from our computers.
However, as we previously said, this extension was included by Microsoft itself. Because TrustedInstaller owns the extension, you won’t be able to uninstall it directly. As a result, you must first transfer ownership to the administrator of the PC. As the most critical component of this procedure, make sure you’re logged in as an Administrator. Proceed with the approach once you’ve double-checked that.
- Step 1- To access the Windows Start menu, press the Windows Key on your keyboard.
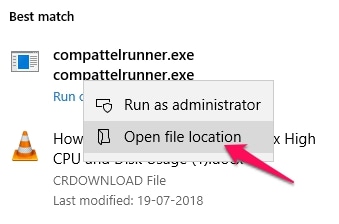
- Step 2- You should notice a programme entitled CompattelRunner.exe at the top of the list under the Programs section if you type compattelrunner.exe. Right-click CompatTelRunner and select Open File Location from the context menu.
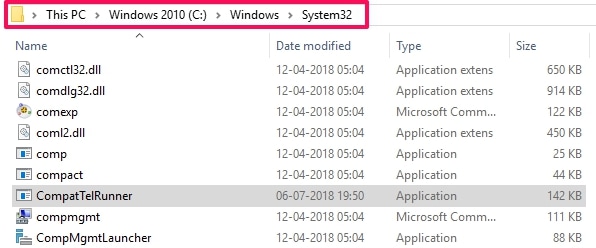
- Step 3- When you select Open File Location, a new window will pop up with the CompatTelRunner application installed in it. This will be located in your Windows installation’s System32 subdirectory.
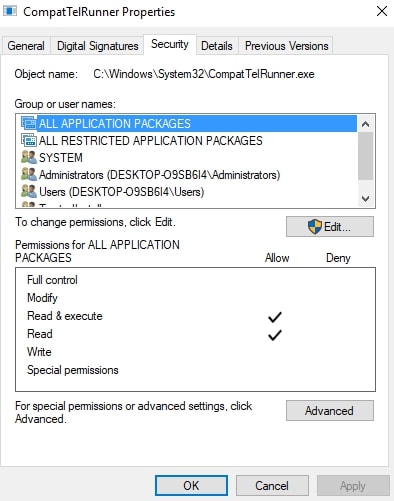
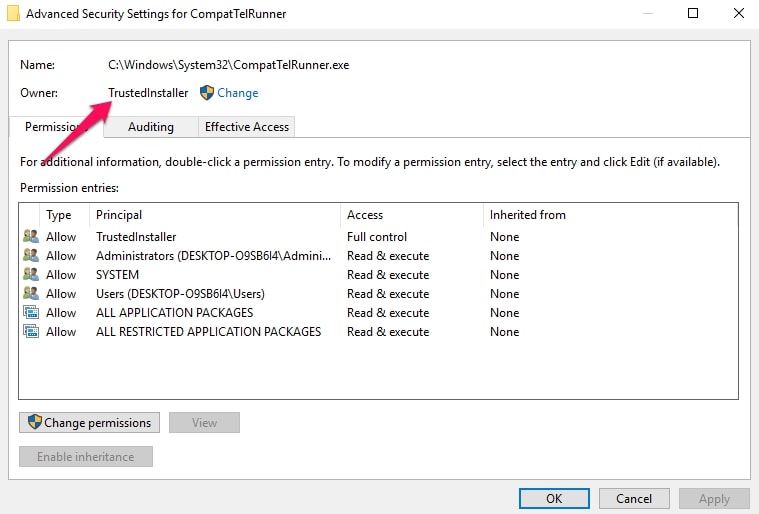
- Step 4- Right-click on CompatTelRunner again and choose Properties to see its Properties page. Go to the Security tab in CompatTelRunner’s Properties. You’ll see that the other users only have Read and Execute permissions, however, TrustedInstaller has full permissions.
This has to be altered since we wish to remove the application from our PC, which is now only possible with TrustedInstaller. As a result, the ownership of CompatTelRunner will now be transferred from TrustedInstaller to Administrator.
- Step 1- To do so, go to the Security tab and select the Advanced option. The current owner is TrustedInstaller, according to the Advanced settings panel.
- Step 2- Change the owner’s name by clicking the Change button next to it and typing Administrators.
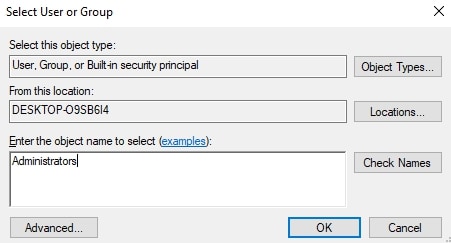
- Step 3- When you click OK, the Administrator becomes the owner of CompatTelRunner. After that, click Apply to complete the process of changing the application’s ownership.
- Step 4- The following steps are straightforward now that the ownership has been transferred. Close the Security tab’s advanced tab, and you’ll see the Properties window for our application. Change the Permissions of Administrators to whom we just transferred ownership under the Security tab.
- Step 5- Click on Advanced once more, and then on the Change Permissions option to acquire administrator access. Now, from the list, double-click the Administrators option and give them Full Control, then hit OK.
We’ve now entirely transferred control of CompatTelRunner from TrustedInstaller to Administrator. As a result, just remove the compattelrunner.exe application from the System32 folder by right-clicking on it. Despite the fact that this is the best-known-to-work approach accessible to us, reports indicate that it does not work for certain people. As a result, the last alternative is to completely delete the KB2952664 update, which is the core cause of the CompatTelRunner application’s installation on our PCs. However, this is only a temporary solution because Windows will automatically install this update again.
Method 3- Remove the KB2952664 Update from your Windows 7 computer.
If nothing else seems to be working for you and you just want to remove the KB2952664 update, you may do so by following the steps outlined below. Furthermore, it’s worth noting that this is a compatibility update for Windows 7. Microsoft published this to ensure that your Windows 7 PC is running the most recent version.
- Step 1- By using the Windows key + R and typing cmd, you may open the Command Prompt window. Right-click Command Prompt and choose Run as Administrator from the context menu.
- Step 2- To remove the KB2952664 Windows update, run Command Prompt as Administrator and execute the following command.
dism /online /get-packages | findstr KB2952664

- Step 3- After running the command, press Enter to get a list of the updated versions that are currently installed on your computer. Type the following command once you’ve seen the list of versions installed on your PC.
dism /online /remove-packages /PackageName:Package_for_KB2952664~31bf3856ad364e35~amd64~~6.1.1.3
- Step 4- Finally, use the following command in the same Command Prompt Window to ensure that the update has been completely removed from your machine.
Get-HotFix –id KB2952664

Surprisingly, if you get an error, you can be confident that everything is properly removed. When you run the above command in Command Prompt, you should obtain an error message that says “cannot locate HotFix,” indicating that it was successfully removed.
As previously said, this is not a long-term solution because the compattelrunner.exe will be reinstalled as soon as Windows is upgraded. However, if you’re having serious compattelrunner.exe disc consumption issues, this is a good temporary solution.
It’s also conceivable that you’re not running the Windows 7 KB2952664 update yet still have the compattelrunner.exe excessive disc utilisation problem. As a result, you can also remove the Windows 7 updates KB2977759 and KB2976978, which have been reported to cause this problem. To remove these versions, just change your version number in the Command Prompt with the above-mentioned KB2952664.
Conclusion
As previously stated in this post, Compattelrunner.exe is not a Trojan or a Malware. However, it is well known that this extension can consume up to 70% of disc and CPU resources, which is a serious worry. There is also a privacy concern, as the extension logs whether or not there is a problem on Windows. Thus, if you have an issue with compattelrunner.exe consuming a lot of disc space or prefer privacy, you may safely delete/uninstall/disable this extension using the techniques listed above.